Showing posts with label flower. Show all posts

Wednesday, June 1, 2011

DIY- Felt Rose Hair-clip

I think that it's high time for another Miss Yellow Shoes DIY don't you?
Today I'm going to show you how to make a simple hair-clip using felt 
(one of my favorite fabrics).


You will need...
- two colors of felt
- one hair-clip
- one drinking cup
- pen
- scissors
-elmers glue


First, use the mouth of your cup to trace one big circle on one color of felt.
Then use the bottom to trace a smaller circle on your second color of felt.


Cut out your circles.
Then, by cutting in a spiral, work you way from the outside into the center of your circle.
*hint- don't cut your spiral too thin
less (cutting) is more


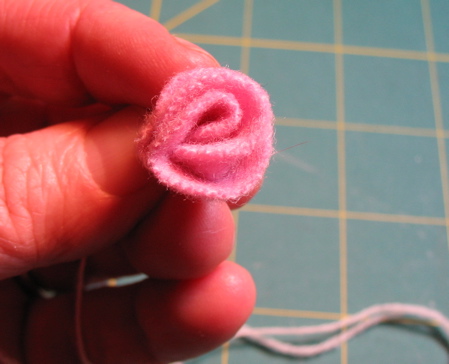
Repeat step three with your second circle and you will have something looking much like picture four.
Now again, working from the outside in, twist and twirl your spiral into a rose shape.
(refer to image if necessary)


Use elmers glue to seal the last few twirls of your rose.


Repeat steps five and six with your second rose.
(are your fingers sticky yet?)


Now cut out a small rectangle of felt and glue it onto your hair-clip.
Next apply more glue to the top of the rectangle so your roses have something to help them stick.
*hint- make sure that the clip is closed while drying
this will keep the roses close together without any gaps


Extra Ideas
- make bigger circles to make roses with a bolder statement
- glue roses onto a headband with ribbon
- sew a safety pin on the back to turn the rose into a brooch
-glue roses onto your backpack with a hot-glue-gun

These roses take hardly any time to make and can be used as an embellishment for almost anything!


See my tutorial in Cut out and Keep!

Wednesday, May 11, 2011

Wedding- Bride Bouquet DIY 2

Oh Hello There!
Back for MORE wedding posts?
Today I'll be featuring another bridal bouquet (also by rocknrollbride.com)...


Isn't it pretty?
This bouquet is a little simpler than yesterday's but still totally gorgeous!
Here's the teaser...


Materials:
Fabric flowers & assorted flower hair-clips (I would have loved fresh flowers but I wanted to have something I could keep forever)
Cotton twine
A few scraps of wool
Scissors
An egg beater/whisk (as you can imagine, it was such a ‘light-bulb’ moment when I thought of using it for the stem!)
Step 1:
Hold on to the whisk as shown on the image and with a little force, try to deform it into a oval/circular shape. You can use tiny wires or something to tie on the criss-cross parts to keep them stay in shape if you need to.
Step 2:
Stuff the scraps of wool inside in whisk. This will help form the shape of the bouquet.
Can you believe you’re almost done? I told you it was easy!
Click here for the rest of this easy tutorial.
This week is all about weddings so be sure to stop on by tomorrow!

Tuesday, May 10, 2011

Wedding- Bride Bouquet DIY 1

Good Morning!
I'm in the wedding mood as you will see in this week's posts...
Today's post features a fabric bridal bouquet from rocknrollbride.com!


1. Fabric
2. Tools: Scissors, Rotary Cutter, Self-Healing Mat, Ruler, Compass, Glue gun with lots of glue.
3. Notions: Felt, Embroidery Thread or Regular Thread, Green Cloth Floral Wire, Buttons, Embellishments.

For this tutorial I decided to make my bouquet nautical themed so I choose a lot of red, blue, white and yellow fabrics and found buttons and some gold rope that made perfect embellishments.
First thing you need to do is create your flowers. I like to use two types of flowers, (Yo Yo Flowers and Ruffle Flowers,) but you can also add any other kinds of flowers; crocheted or knitted flowers, felt flowers, etc.


1. To make Yo Yo Flowers you will need to cut out circles in varying sizes. I like to use a compass so I can make many different sized circles without having to cut out different templates. I recommend circles that are no smaller than 3” in diameter.
2. Using a needle and thread sew around the edge of the circle. You don’t have to be too careful here, just try to stay close to the edge.
3. Continue sewing around the circle, the fabric will gather as you go.
4. Once you get all the way around knot your thread and you’re finished!

See the rest of the tutorial by clicking here.
Have a happy Tuesday and take time to make something beautiful today!

Monday, May 2, 2011

DIY Flower Projects

What better way to welcome in the Spring than with some crafty flowers?
I've rounded up some sweet tutorials...check em out below!


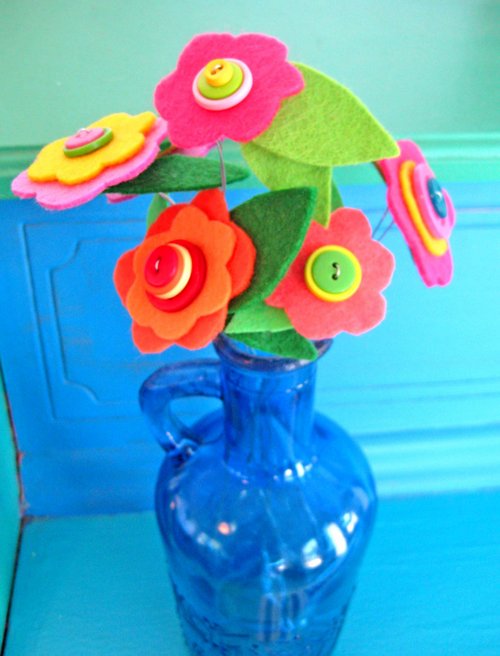
button flower bouquet 1


P.S.
One of my favorite things about Spring is that I can walk barefoot outside again.
What's your favorite thing?

Thursday, March 24, 2011

What do you get when you order a handmade happy?


Hello Readers!
Ever wonder what you would get in the mail when you order a Handmade Happy?
Well I'm here to tell you!


After all the excitement you're sure to feel after receiving a package in the mail, you would eventually open up your treat and pull out a baggy looking similar to these above. 


So happily packaged, your Handmade Happy is just waiting for you to enjoy all it's wonders. But wait! What's this? There's more inside than meets the eye...


Ahh yes, each Handmade Happy comes along with a couple business cards (for you to share with your friends) and a lovely little bookmark designed by yours truly. 
Awwww, Isn't that sweet?


I also wanted to give you a sneak peak of my latest Handmade Happy...


A Demain!
(till tomorrow)

Friday, February 25, 2011

No, I'm not dead

It's been a while since I've posted anything and that could be blamed on work, getting sick....again, and my wonderful fiancée coming up for a surprise visit! 
So I'm getting back on track (cross my fingers) with blogging and crafting and wedding planning!

Actually...I need to get to work soon; but I wanted to chit chat a bit about the wedding first.


So I'm pretty sure I've decided on a dress (sorry, you won't see that until the big day), and I'm totally going to wear yellow shoes underneath! Our colors are green, yellow, and dark gray so my feet won't stick out like a sore thumb. 


I got inspired by this picture and thought it would be cute for centerpieces; but after a little more brainstorming, Mike and I decided to use traditional clay pots with yellow flowers and green moss. I'll tie a bow of some sort around the pot and three picture frames will surround the centerpiece. The tables will be round and a white table cloth will be placed on each table with half the tables with a  yellow runner and half with a green one.


That's all that I can write at the moment; work is calling my name!

Friday, February 11, 2011

DIY Valentine Crafts Roundup

Yay it's Friday!
Now you've got a whole weekend in front of you that you can fill with oodles and oodles of Valentine crafts.

Let's start with food shall we? (guys like food anyway)


These cute little cake pops are simple to make and great for just about everyone.


How about a 5 minute cake in a mug for that special somebody? Or...make a bunch of these before watching a chick flick with all the girls!


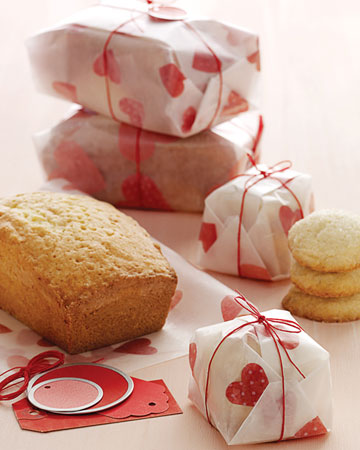
You don't just have to give away chocolate on Monday. Why not bake some bread of muffins? Don't forget to wrap them up in pretty paper!


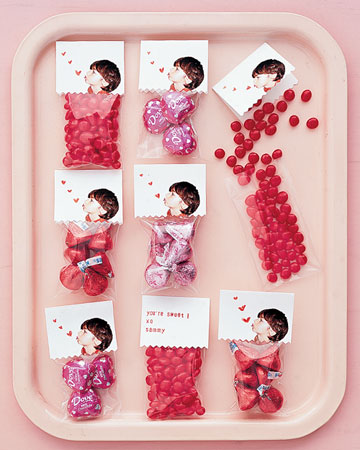
This is a popular trend this year with crafter and bloggers. You can either glue together your own candy bag topper with pretty paper and stickers, or create your own using your computer. Just print it out, cut, and either staple or glue your topper to the candy bag.

Now how about some flowers?


Use all those left over fabrics to make a dozen pretty roses and tie them all together with some red ribbon.


Here's another tutorial on how to make a cute felt rose. (and there great thing about felt it that...no hemming!)


You could also use these fabric roses for headbands and decorative pins. Just take the idea and run away with it!


I know I've shared this tutorial before, I just love it so much!

I just Heart these next tutorials!


Here's another idea you could use to clean up all your scraps of fabric. Make some pretty heart pillows!


Here's girl who know what to do with those conversation hearts. I think that they taste like chalk personally...


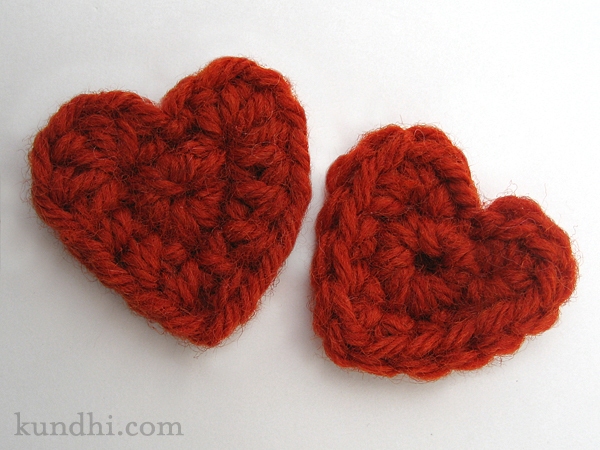
I must learn the art of crocheting hearts!

And I saved this one for the last tutorial because I am so in love with this idea!


Don't you just totally heart this love note?????
Click here to see the step by step instructions for making this sweet note. 

So that's it for my little roundup. I hope you all have a relaxing weekend full of whatever it is that you love. For me? That would be sleep...crocheting...and chatting with my handsome fiancée over gmail.

Don't forget to check out my youtube channel for some more tutorials and what not. 


Happy Valentine Weekend! 

Thursday, November 18, 2010

Last Night


This is my best friend Jenni. She's on Northland's basketball team and they just got all their gear for the season. She was super excited about the  uniforms and the traveling gear but realized that all the team's duffel bags were exactly the same. She came in my room last night asking if I would make her something to go on her bag so she could tell it apart from the rest without looking inside each and every duffel bag.
I was very excited at the challenge...it needed to be something unique just for Jenni, and had to be finished before 8am the next morning (before they left for their first away game).

I came up with this...


It's a little plushie of the number 25 (her jersey number) with a little ribbon loop so Jenni can attach it to her bag. 


I'm really happy with how it turned out...I loooove buttons and tried to pick her favorite colors.


I was having fun taking pictures of my little creation...


just one more ok?


So while I was doing that, Mike and I sat in the hall and he practiced his history lesson on me (it's due today). I know he'll do great, I wish I could be there for the real thing.


He's a senior this year and I'll be sad when he leaves. I still have a wee bit to go before I can graduate, but I'm sure he'll be calling a lot next year to help me with homework (he's so smart)


This is one of the flowers that I've made. I've only sold one so far but I guess that's because I haven't really been advertising them. Maybe later I can get more pictures up...


Oh! I just found some!


Anywho...I need to get working on some homework!!!


Later