Showing posts with label handmade. Show all posts

Thursday, March 24, 2011

What do you get when you order a handmade happy?


Hello Readers!
Ever wonder what you would get in the mail when you order a Handmade Happy?
Well I'm here to tell you!


After all the excitement you're sure to feel after receiving a package in the mail, you would eventually open up your treat and pull out a baggy looking similar to these above. 


So happily packaged, your Handmade Happy is just waiting for you to enjoy all it's wonders. But wait! What's this? There's more inside than meets the eye...


Ahh yes, each Handmade Happy comes along with a couple business cards (for you to share with your friends) and a lovely little bookmark designed by yours truly. 
Awwww, Isn't that sweet?


I also wanted to give you a sneak peak of my latest Handmade Happy...


A Demain!
(till tomorrow)

Tuesday, March 22, 2011

Wanna Trade?


What if we all wanted to trade crafts?!

I think it would be so much fun if
everyone in our little blog/etsy community,
who is willing to trade their handmade lovelies
for OTHER treasures made by OTHER bloggers,
would add a button to there blog, stating

I TRADE HANDMADE!

If you see the the "i trade handmade" badge on a blog and you would like to trade with that person send them an email and set up a trade.  Don't be shy everyone is nice and none of them bite.  Or if you want to find someone to trade with click on one of the links above and make a new friend.  It's easy, just ask them "would you like to trade"?

Find the original article and a list of traders here!


Friday, February 11, 2011

DIY Valentine Crafts Roundup

Yay it's Friday!
Now you've got a whole weekend in front of you that you can fill with oodles and oodles of Valentine crafts.

Let's start with food shall we? (guys like food anyway)


These cute little cake pops are simple to make and great for just about everyone.


How about a 5 minute cake in a mug for that special somebody? Or...make a bunch of these before watching a chick flick with all the girls!


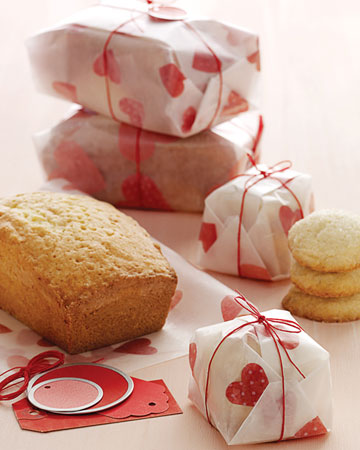
You don't just have to give away chocolate on Monday. Why not bake some bread of muffins? Don't forget to wrap them up in pretty paper!


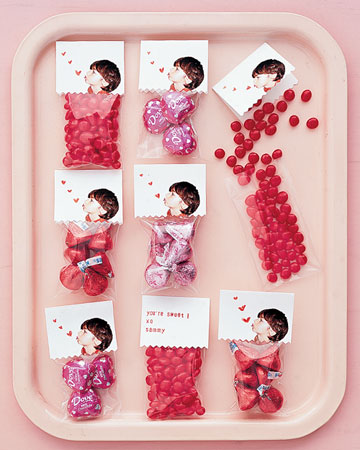
This is a popular trend this year with crafter and bloggers. You can either glue together your own candy bag topper with pretty paper and stickers, or create your own using your computer. Just print it out, cut, and either staple or glue your topper to the candy bag.

Now how about some flowers?


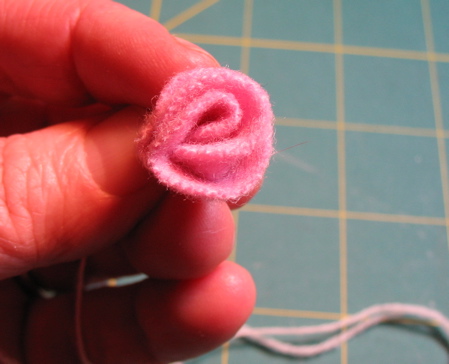
Use all those left over fabrics to make a dozen pretty roses and tie them all together with some red ribbon.


Here's another tutorial on how to make a cute felt rose. (and there great thing about felt it that...no hemming!)


You could also use these fabric roses for headbands and decorative pins. Just take the idea and run away with it!


I know I've shared this tutorial before, I just love it so much!

I just Heart these next tutorials!


Here's another idea you could use to clean up all your scraps of fabric. Make some pretty heart pillows!


Here's girl who know what to do with those conversation hearts. I think that they taste like chalk personally...


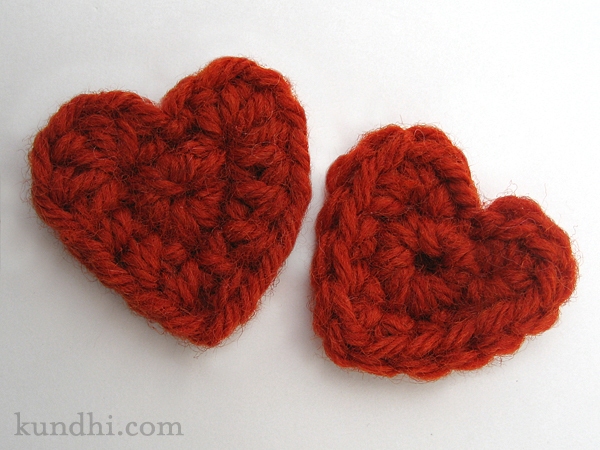
I must learn the art of crocheting hearts!

And I saved this one for the last tutorial because I am so in love with this idea!


Don't you just totally heart this love note?????
Click here to see the step by step instructions for making this sweet note. 

So that's it for my little roundup. I hope you all have a relaxing weekend full of whatever it is that you love. For me? That would be sleep...crocheting...and chatting with my handsome fiancĂ©e over gmail.

Don't forget to check out my youtube channel for some more tutorials and what not. 


Happy Valentine Weekend! 

Friday, January 21, 2011

Shop Announcement


I wanted you all to know that I now have an online shop where I sell my handmade creations!
I am so excited about this!!!!


Saturday, January 1, 2011

My goals for 2012 are......


I've never been a big fan of new year resolutions, but perhaps by posting my goals here I'll be more inclined to keep them. 

The first one is "Plan my DIY wedding".
Mike and I won't be getting married until the summer of 2012, but since I'll be in school and have a super low budget, it doesn't hurt to start early. I think that I'll post tutorials and ideas here and on my youtube channel for other brides. I'll be making most of everything for my wedding including:
1. my veil
2. all the flower arrangements, bouquets and such
3. the cake (with Mom)
4. updating an old cake topper
5. favors
6.all decorations
7. programs (for the service)
and a bunch of other goodies!

The second thing on my list is to start my own business. I would like to sell some of the things that I make (mostly because I don't have room for everything) but also to make a small profit. I hope to make enough to save up for a nice road trip (adventure) vacation with Mike after we get married. 
I'm currently working on making more things to stock up my little shop with and you'll be first to know when it opens!

I would also LOVE to make one tutorial a week for my readers and my viewers. So far I haven't really been able to be consistent and I would really like to up my number of followers. I know that if I put the work into it, I will get results!

Losing 30 pounds....yeah that's for health reasons but also for my wedding. 
(Hey! Every girl wants to look her best!) 

Finish school! That's a big one. 
Why? I really really want my teaching degree and I don't want to have to deal with school right after getting married to Mike either. I would just love to get married, have a nice honeymoon, settle in a cute little apartment, and jump right into teaching!
Ahhh....that would be a dream.

What are you goals? Did you keep your old ones from last year? Oh yeah...download your own copy of this clip art here!


Happy New Year!

Sunday, December 12, 2010

DIY- Scarves

So, it snowed so much yesterday and today that they closed down campus. We weren't allowed to leave and those already gone had to call in to see when they could get back. The weather was terrible with all the wind and running form building to building in knee deep snow. Days like today make me extremely thankful for hats, gloves, boots, coats, and scarves.
Today's post is a tribute to that last one...scarves.

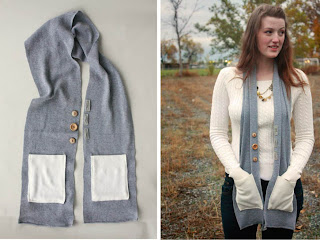
Here are some scarf tutorials that you can make yourself (for fashion purposes or warmth)! 
Just click on the picture for instructions.

Thursday, November 18, 2010

Last Night


This is my best friend Jenni. She's on Northland's basketball team and they just got all their gear for the season. She was super excited about the  uniforms and the traveling gear but realized that all the team's duffel bags were exactly the same. She came in my room last night asking if I would make her something to go on her bag so she could tell it apart from the rest without looking inside each and every duffel bag.
I was very excited at the challenge...it needed to be something unique just for Jenni, and had to be finished before 8am the next morning (before they left for their first away game).

I came up with this...


It's a little plushie of the number 25 (her jersey number) with a little ribbon loop so Jenni can attach it to her bag. 


I'm really happy with how it turned out...I loooove buttons and tried to pick her favorite colors.


I was having fun taking pictures of my little creation...


just one more ok?


So while I was doing that, Mike and I sat in the hall and he practiced his history lesson on me (it's due today). I know he'll do great, I wish I could be there for the real thing.


He's a senior this year and I'll be sad when he leaves. I still have a wee bit to go before I can graduate, but I'm sure he'll be calling a lot next year to help me with homework (he's so smart)


This is one of the flowers that I've made. I've only sold one so far but I guess that's because I haven't really been advertising them. Maybe later I can get more pictures up...


Oh! I just found some!


Anywho...I need to get working on some homework!!!


Later

Thursday, November 11, 2010

Christmas Decorations- Part 7


"The tradition of Christmas trees and Christmas Ornaments is a much disputed one what with several theories about their origin doing the rounds for a long time. The most popular theory holds that the tradition was started by a monk who came to Germany in the 7th/8th century to preach. It is said that this monk was Saint Boniface, the Apostle of the Germans. According to history, the saint was the first one to bring a fir tree to the German people to decorate, for he claimed that its triangular shape represented the Holy Trinity - God, his son Jesus, and the Holy Spirit. The tradition was lapped up by the devout Germans who started decorating the Christmas tree in a liturgical way with simple, white candles. This however, changed in the 15th century when ornaments began to be incorporated into the Christmas decorations in Germany. In Latvia, circa 1510, a fir tree was decorated with roses which was associated with the Virgin Mary. This event is often hailed as the pioneer of modern Christmas decorations. 

In 1605, a tree in Strasbourg (a city on the Rhine in eastern France near the German border) was brought indoors and adorned with paper roses, lighted candles, wafers, nuts, and sweets. This is said to be a groundbreaking moment in the history of Christmas decorations for it kicked off a new trend, adornment of the Christmas tree in an indoor setting. With time, the decorative ornaments grew more diverse and each family used its own inventiveness to beautify the Christmas trees. Later decorations included painted eggshells, cookies, and candies. The high point came with the introduction of tinsel in 1610, an item that has been a favorite decorative item since. Tinsel was originally made with pure silver."


I don't have instructions for this but you can paint just about anything on globes that you buy from the store. Maybe even paper mache them...oooh the possibilities!


Here's another example of a painted globe.


This guy is also a classic!


This rose ornament is really pretty. But don't just stick with one flower, let your imagination fly and use all kinds of colors and combinations. (oh, and the instructions are here)


I think that buttons have made it into just about every single one of my Christmas posts...but I love them so much!


Now comes my favorite part of the post... We get to learn a craft together! This one has been brought to us by http://saidosdaconcha.blogspot.com!


"Why buy Christmas ornaments that look handmade when you can actually make them so easily? Sharon from The Key Bunch requested me for instructions on making Christmas ornaments so I've tried to document all the steps you need to take when making your personalised ornaments. So, this is not really a tutorial, but rather a bunch of suggestions written in an orderly manner. Shall we get to it?"


"1- First of all, you may want to look at some books, magazines, blogs and flickr photos for inspiration. Decide on shapes and look for patterns online. That's right, I'm not going to provide you with any template, sorry! Just google 'candy cane', 'Christmas stocking', 'gingerbread man', 'mitten', 'heart' or -- even better -- draw your own shapes. Then assemble all your materials: various pairs of scissors, a pencil/pen, your glasses (optional), as many types and colours of thread as you wish, baker's twine (if you own it), loads of buttons, fabric scraps, rick-rack, ribbon, pins and needles. You may notice that I've chosen a very limited colour palette because I believe that's the key to success. But of course you can go wild and pick all the colours of the rainbow."


"2- Gather all your felt scraps and turn your radio on!"


"3- I decided I'd make my templates the old-fashioned way: first I printed them out and then traced over them using some sheets of translucent tracing paper I found at the bottom of a drawer (I think I have these sheets since elementary school). I then traced the shapes onto a piece of a cereal box for durability."


"4- Trace all your shapes onto felt and cut them neatly. Always trace and cut in pairs because you'll be stuffing the ornaments later."


"5- Here they are all cut and ready to be embelished."


"6- Now comes the fun part: play around with rick-rack, ribbon, buttons and scraps until you are happy with how it looks. Then sew everything onto your ornament piece. There are so many possibilities here that I had to choose and show you how to make only one type of ornament. That means that from now on you'll watch how to finish this star; then, in the end of this set, you'll see other examples of ornaments you can make."


"7- Let us get back to the star: make a loop (you'll want to hang it on a tree branch, right?) and begin sewing the front and the back pannels together"


"8- You can do it either by hand or machine and use different kinds of stiches. Here I sewed it by hand using the simplest stich ever."


"9- When you're nearly finished, grab a bit of polyfill and stuff it through that little opening. You may want to use a chopstick or other pointy tool to get the stuffing in all the tiny and tricky places."


""10- Close the opening. You're done! :)"


Here are some more pictures of her gorgeous handcrafted ornaments!


I'm feeling a little better today health wise, or maybe I'm just running on adrenaline. Battling this Mono is really taking a toll on me. I sleep a lot (through some of my classes) and homework is the last thing on my list. I hope I can still pass all my classes this semester...