Showing posts with label tutorial. Show all posts

Monday, June 6, 2011

Show and Tell- My Weekend

Good Monday Morning Readers,
How as your weekend?


I found this simple tutorial and made an incognito stamp out of an eraser that I had lying around...


Then I went thrifting and picked up this really happy straw purse!
I was thrilled because I feel in love with a $175 one at the mall and I got this one for 5 bucks!
It pays to shop around.


I think I might give it a new lining. Other than that...this is exactly what I was looking for.


Oh yeah,
and I also found an old-school straw hat.

Saturday, June 4, 2011

Guest Post- LDC Designs

Hellow Readers,
I have a special treat for you!
Today Miss Yellow Shoes is having its very first guest post by Lindsay, and she's put together a sweet little tutorial for us.
Now wasn't that nice?
Pssst! Let me know if you wanna do a guest post too!


Hey everyone! This is Lindsay from LDC Designs! I am super excited to be doing a guest post for Miss Yellow Shoes. I thought I would show you all how to make this really cute and simple bracelet. All it takes is some leather & lace. Super simple! You can actually buy all that you need at wall-mart! 
So lets get started!
First you will need to cut out a piece of lace about a half an inch shorter then your wrist. Then but out two pieces of leather twice the length of your wrist. 


Now take one piece of leather and start weaving it through the edge of the lace.


Once you have done that, start doing it to the other side with the other piece of leather.


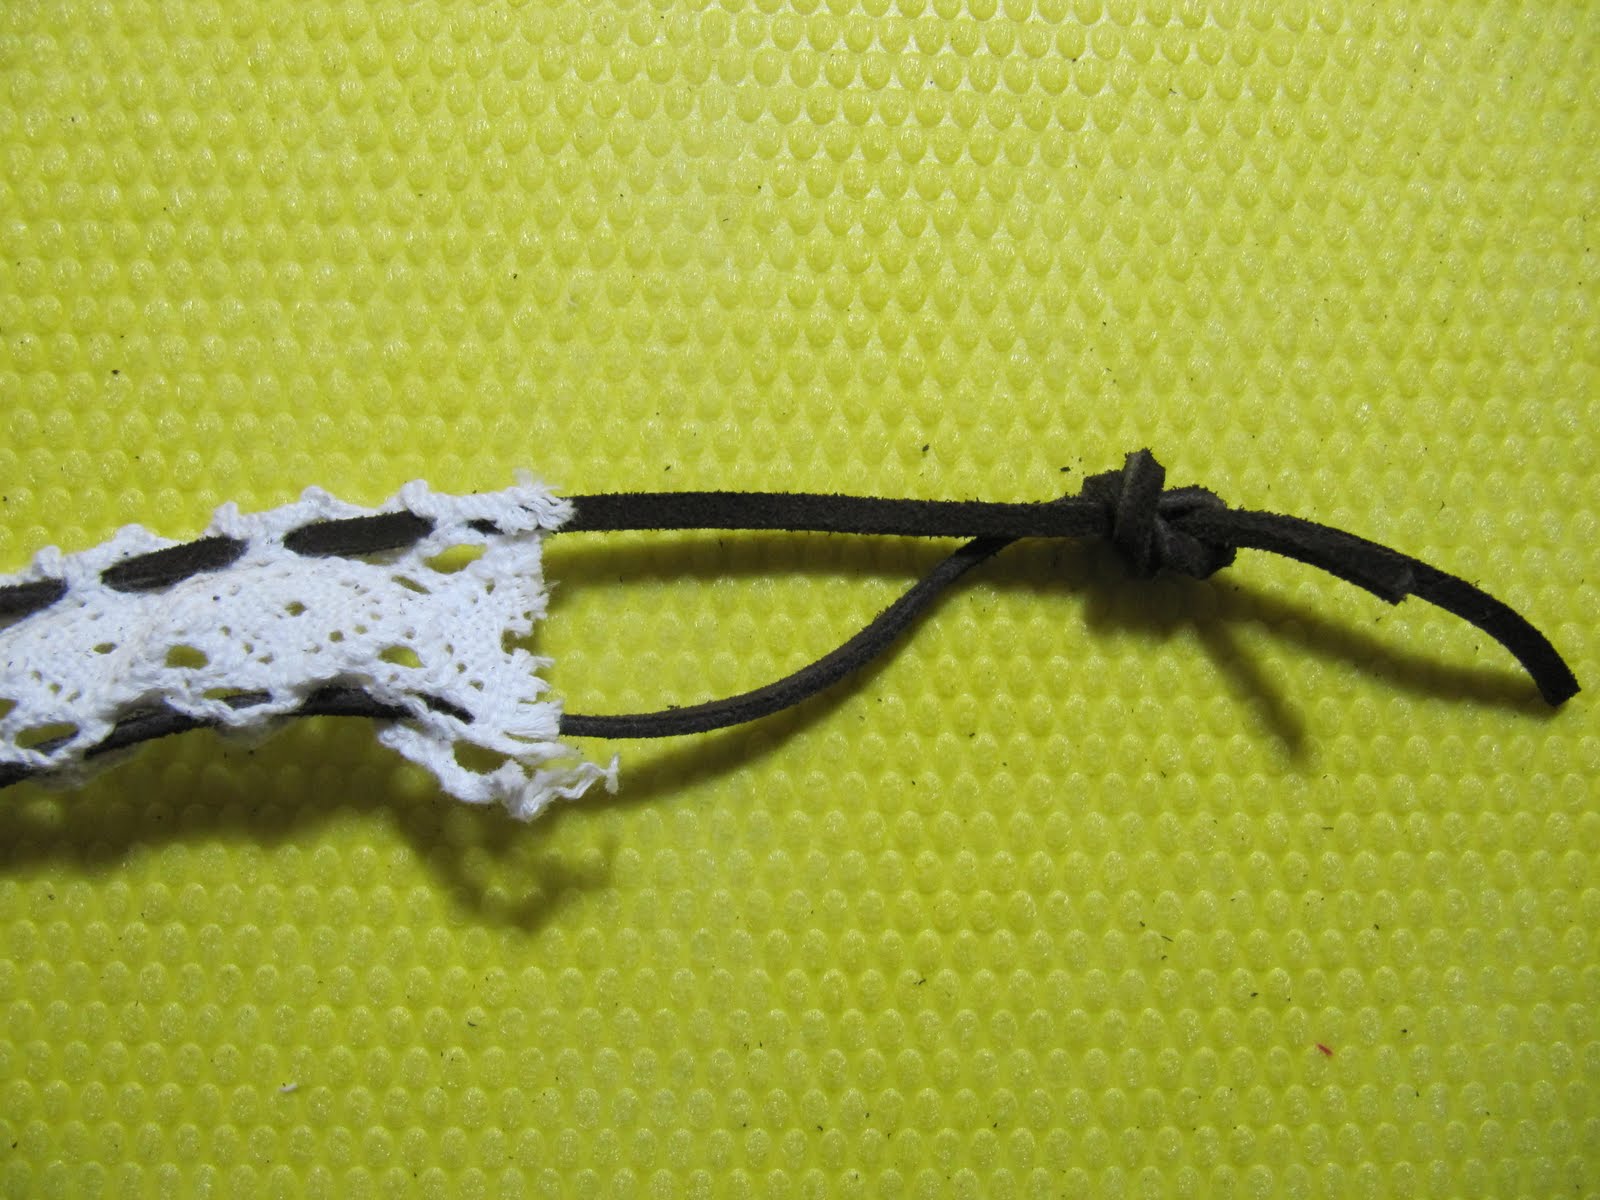
now tie a knot in both ends of the leather. Make sure you tie them around the size of your wrist, but just a tad bit larger!


Now to tie it on your wrist you will put one knot through the loop before the other knot. Like this...


Once you have it tied so that it fits well, cut off the extra leather after both knots.


And there you have it! A cute leather and lace bracelet in less than ten minutes! Try adding beads to the leather for a different look!

Thanks so much for asking me to guest post, Brittany! Check out my blog for more DIYs ! xo ldc

Friday, June 3, 2011

Wedding DIY: Bouquets


Yay it's Friday!
Yesterday I promised to give you a sneak peek at my wedding bouquet.
If you remember back to this post, I was exploring the option of making my own "non-traditional" bouquet.
I'm known for my craftiness, and would just love to implement that into our wedding.
This first bouquet is an unfinished prototype, but I was bound and determined to show it to you whether it was complete or not.

First I made a bunch of white and yellow roses...
(tutorial here, or here)


(sorry I only have pictures of the white ones)
Then I used a whisk as my skeleton and glued on all my felt roses and leaves.


I have no idea why the white roses look blue in this picture.
Anyway, I was planning on decorating the handle with some ribbon and a big bow.
After a few discouraging words, this poor bouquet got tossed in the trash...
(don't worry)
(I saved it from doom)
I am planning on making two to three more bouquets so I can experiment with different fabrics.
It's more of a trial and error process, but I am learning along the way. 


Tell me, honestly...
What do you think of my felt bouquet?

Wednesday, June 1, 2011

DIY- Felt Rose Hair-clip

I think that it's high time for another Miss Yellow Shoes DIY don't you?
Today I'm going to show you how to make a simple hair-clip using felt 
(one of my favorite fabrics).


You will need...
- two colors of felt
- one hair-clip
- one drinking cup
- pen
- scissors
-elmers glue


First, use the mouth of your cup to trace one big circle on one color of felt.
Then use the bottom to trace a smaller circle on your second color of felt.


Cut out your circles.
Then, by cutting in a spiral, work you way from the outside into the center of your circle.
*hint- don't cut your spiral too thin
less (cutting) is more


Repeat step three with your second circle and you will have something looking much like picture four.
Now again, working from the outside in, twist and twirl your spiral into a rose shape.
(refer to image if necessary)


Use elmers glue to seal the last few twirls of your rose.


Repeat steps five and six with your second rose.
(are your fingers sticky yet?)


Now cut out a small rectangle of felt and glue it onto your hair-clip.
Next apply more glue to the top of the rectangle so your roses have something to help them stick.
*hint- make sure that the clip is closed while drying
this will keep the roses close together without any gaps


Extra Ideas
- make bigger circles to make roses with a bolder statement
- glue roses onto a headband with ribbon
- sew a safety pin on the back to turn the rose into a brooch
-glue roses onto your backpack with a hot-glue-gun

These roses take hardly any time to make and can be used as an embellishment for almost anything!


See my tutorial in Cut out and Keep!

Wednesday, May 11, 2011

Wedding- Bride Bouquet DIY 2

Oh Hello There!
Back for MORE wedding posts?
Today I'll be featuring another bridal bouquet (also by rocknrollbride.com)...


Isn't it pretty?
This bouquet is a little simpler than yesterday's but still totally gorgeous!
Here's the teaser...


Materials:
Fabric flowers & assorted flower hair-clips (I would have loved fresh flowers but I wanted to have something I could keep forever)
Cotton twine
A few scraps of wool
Scissors
An egg beater/whisk (as you can imagine, it was such a ‘light-bulb’ moment when I thought of using it for the stem!)
Step 1:
Hold on to the whisk as shown on the image and with a little force, try to deform it into a oval/circular shape. You can use tiny wires or something to tie on the criss-cross parts to keep them stay in shape if you need to.
Step 2:
Stuff the scraps of wool inside in whisk. This will help form the shape of the bouquet.
Can you believe you’re almost done? I told you it was easy!
Click here for the rest of this easy tutorial.
This week is all about weddings so be sure to stop on by tomorrow!

Sunday, April 24, 2011

Easter Morning!

Let me start off by telling you all that Easter is my favorite holiday of the year (yes it even beats Christmas)!

Happy-easter-81916-320-233_large

Fun Facts

When taking a bite into a chocolate bunny, 76% of Americans prefer to bite off the ears first. 5% eat the feet first and 4% eat the tail first.
In the old days pretzels were associated with Easter because the twists of the pretzel were thought to resemble arms crossing in prayer.
The White House has hosted an Easter egg roll every year since 1878.
The tradition of giving eggs at Easter time has been traced back to Persians, Egyptians, Gauls, Greeks and Romans, to whom the egg was a symbol of life.
And here's a good one...
In medieval times a festival of egg-throwing was held in church, during which the priest would throw a hard-boiled egg to one of the choir boys. It was then tossed from one choir boy to the next and whoever held the egg when the clock struck 12 was the winner and retained the egg.

Now for a little Easter DIY


Fave Crafts posted this cute tutorial on how to make some festive garland.
Find the instructions here.

Easter Egg Cookies Recipe

"These festive cookies are loosely based on the Greek Easter specialty koulourakia."
Don't know what koulourakia is? Click here to be enlightened.
Head on over to My Recipes to learn how to make these Easter Egg Cookies.

I hope you all have a wonderul Easter Sunday filled with family, friends, and lots of chocolate.

Thursday, April 14, 2011

DIY Glitter Vase

I went to the mall the other day and fell in love with a gorgeous vase.
It would have been perfect for a small kitchen table but the price tag made me walk away empty handed. 
I could still picture the pretty, glittery vase in my mind while driving home. Then it hit me. 
"Hey, I bet I could make my own!"
So off to the dollar I drove.


Vase = 2 dollars
Glue = 1 dollar
Self Adhesive Gems = 1 dollar
Glitter Packet = 1 dollar
Total = 5 dollars


First, I washed the vase and inserted my hand inside so I could have complete control.


Then I swirled glue around the vase sparingly since I knew I would be doing several layers of glitter.


Then I sprinkled on my first color of glitter and let dry.
(You can do several colors or just one)


Then I swirled on more glue...


And sprinkled on my second color!


I continued this process of gluing, sprinkling, and drying until I was satisfied with my vase.


I let my vase sit for a few hours before decorating with these self adhesive gems. They are tiny enough to go unnoticed by big enough to catch the light and sparkle!


These pictures really don't do the vase justice. A camera can't really catch all the sparkle and beauty of this vase.

See my tutorial on "Cut Out and Keep"

Tuesday, February 1, 2011

DIY Valentine Cards


Yay! It's the first of February, and I'm so excited to send out my valentine craft to my craft swap buddy.
Today was my day off at work so I made some pretty little Valentine cards. I would love to show you how to make them, but first...a little history...

"Valentine's Day started in the time of the Roman Empire. In ancient Rome, February 14th was a holiday to honour Juno. Juno was the Queen of the Roman Gods and Goddesses. The Romans also knew her as the Goddess of women and marriage. The following day, February 15th, began the Feast of Lupercalia.


The lives of young boys and girls were strictly separate. However, one of the customs of the young people was name drawing. On the eve of the festival of Lupercalia the names of Roman girls were written on slips of paper and placed into jars. Each young man would draw a girl's name from the jar and would then be partners for the duration of the festival with the girl whom he chose. Sometimes the pairing of the children lasted an entire year, and often, they would fall in love and would later marry.


Under the rule of Emperor Claudius II Rome was involved in many bloody and unpopular campaigns. Claudius the Cruel was having a difficult time getting soldiers to join his military leagues. He believed that the reason was that roman men did not want to leave their loves or families. As a result, Claudius cancelled all marriages and engagements in Rome. The good Saint Valentine was a priest at Rome in the days of Claudius II. 
He and Saint 
Marius aided the Christian martyrs and secretly married couples, and for this kind deed Saint Valentine was apprehended and dragged before the Prefect of Rome, who condemned him to be beaten to death with clubs and to have his head cut off. He suffered martyrdom on the 14th day of February, about the year 270. At that time it was the custom in Rome, a very ancient custom, indeed, to celebrate in the month of February the Lupercalia, feasts in honour of a heathen god. On these occasions, amidst a variety of pagan ceremonies, the names of young women were placed in a box, from which they were drawn by the men as chance directed.


The pastors of the early Christian Church in Rome endeavoured to do away with the pagan element in these feasts by substituting the names of saints for those of maidens. And as the Lupercalia began about the middle of February, the pastors appear to have chosen Saint Valentine's Day for the celebration of this new feaSt. So it seems that the custom of young men choosing maidens for valentines, or saints as patrons for the coming year, arose in this way."


 Did you know...
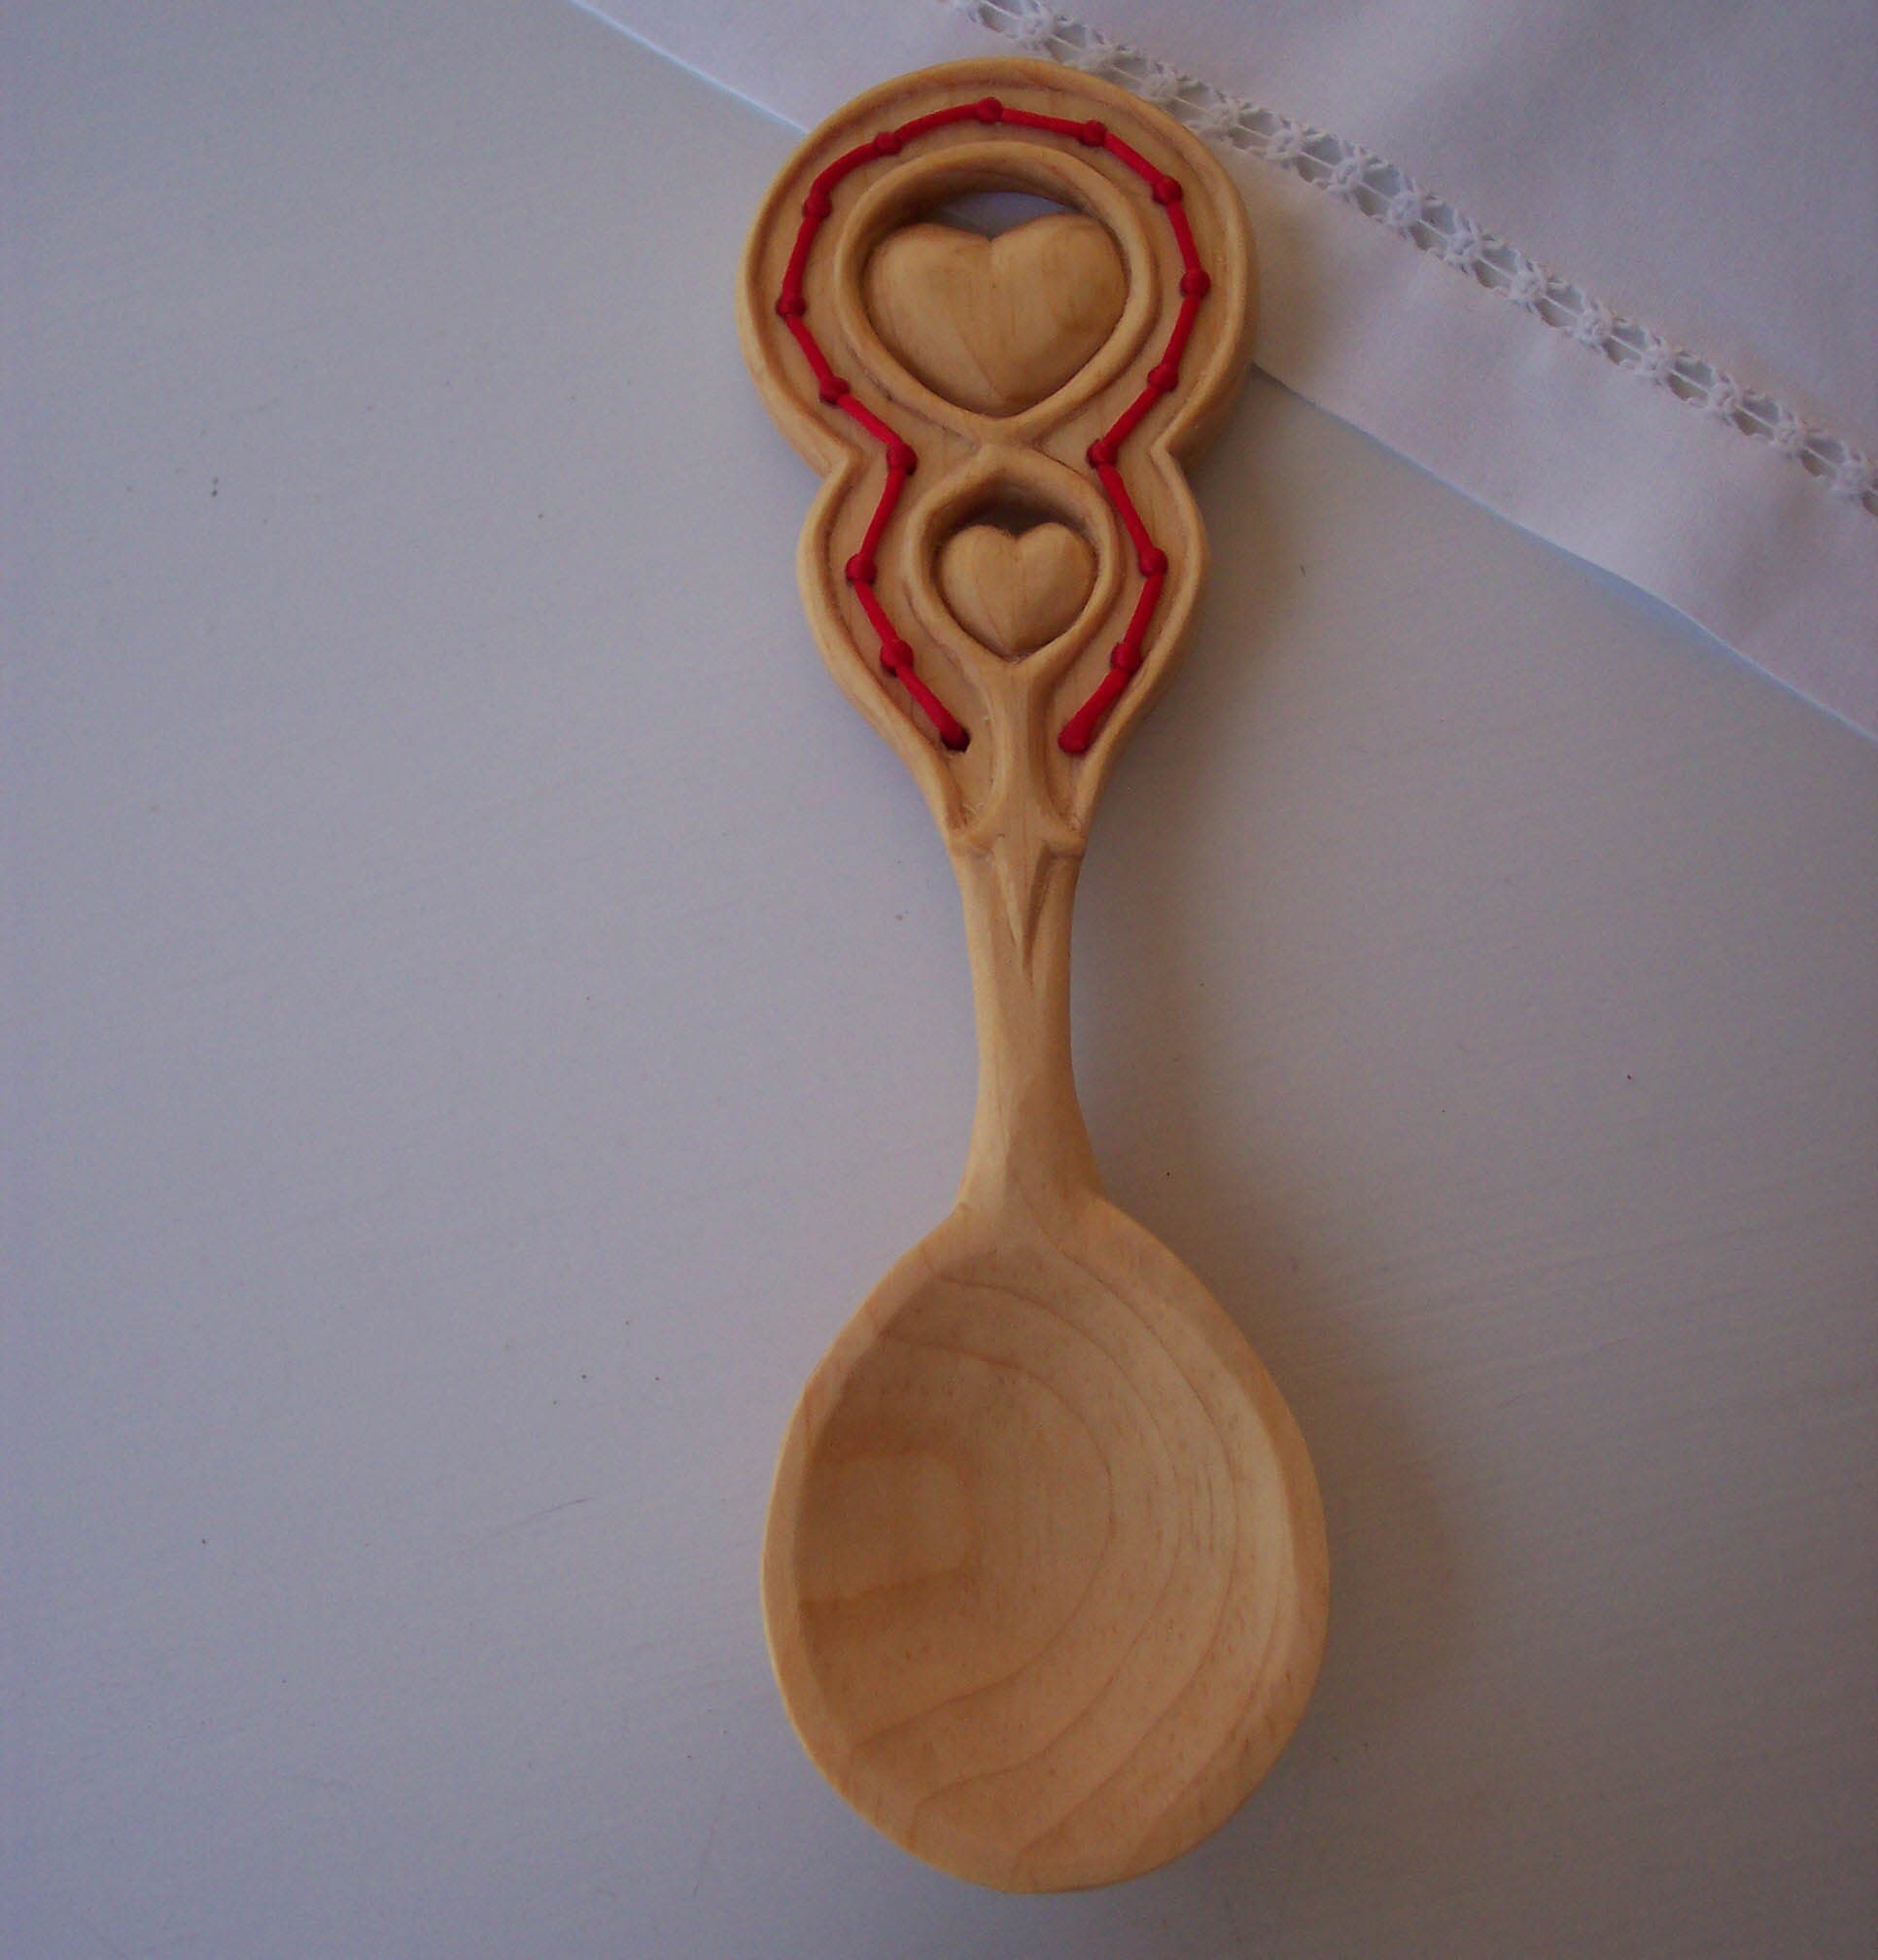
In Wales wooden love spoons were carved and given as gifts on February 14th. Hearts, keys and keyholes were favourite decorations on the spoons. The decoration meant, "You unlock my heart!"

A love seat is a wide chair. It was first made to seat one woman and her wide dress. Later, the love seat or courting seat had two sections, often in an S-shape. In this way, a couple could sit together -- but not too closely!

If you cut an apple in half and count how many seeds are inside, you will also know how many children you will have.

Think of five or six names of boys or girls you might marry, As you twist the stem of an apple, recite the names until the stem comes off. You will marry the person whose name you were saying when the stem fell off.

Some people used to believe that if a woman saw a robin flying overhead on Valentine's Day, it meant she would marry a sailor. If she saw a sparrow, she would marry a poor man and be very happy. If she saw a goldfinch, she would marry a millionaire.


Click on the card above to watch me make a cute little valentine.

Pssst! Click on St.Valentines picture so read his personal story!
 

Sunday, January 30, 2011

How to make my tomato soup

If you've been reading along, you should have known that I am again sick in bed...ugh...but being sick means I get to eat soup all the time! I simply love soup and I wanted to share with you how I make tomato soup (from a can) my own. 
From the can, the soup can become rather boring and blah...so here's how I jazz it up using things I already have in the cupboards.