Friday, November 5, 2010

Pine Cone Hunting

Just wanted to say that I was really inspired my all the pine cone projects that I posted earlier today, so my roommate and I went walking around in the woods looking for some pine cones. I tried putting the ones we got right off the tree that hadn't opened yet in the oven to see if they would really open up. Let me tell you...THEY DO! And the room does smell pretty amazing. Just make sure that you get them off the tree before they open up or else they just get hot and dont do very much. 


These are deer tracks...and guess what we saw a little while later on the hike...


Yaaay! I was so excited to see them. There were actually 3 but this is the only one I got a picture off.


We had a real bad storm here last week, and I guess the wind blew down a bunch of the trees.


This is my roommate. Isn't she cute?


Gorgeous!


The hunt went well.


These are the one's that we put in the oven. They actually turned out really well.


Anyway, end of the story is... we got lost and didn't make it back to campus in time for dinner. We had cold cereal and Mike brought us some more food that he had stashed in his room. The pine cones are currently in the oven baking away and they look wonderful! I can't wait to make something with them!


Goodbye and enjoy sleeping in tomorrow fellow college students!


Christmas Decorations- Part 4

Using pine cones to decorate your home during the holidays is a beautiful way to welcome guests. Nature produces cones with unique beauty that may be used for various adornments throughout your home. One of the most beautiful and versatile of all plant materials, pinecones can be scented, painted or varnished and used or creating crafts, floral designs, decorations, and wreaths. They can be used inside or outside.

For a fun family outing with the kids, go out in search of pine cones. Then, after bringing them home, it is best to clean them well to remove all the bugs and dirt that they have collected. Conditioning them in the oven can do this. You don't have to do it, but heating them first melts the sap and as a result adds a nice glaze to the pinecones. Also, pinecones that are not opened will open in the heat. However, if you use them to decorate outside your home, and your climate is humid or wet, the cones may close again. Use an old cookie sheet or cover a sheet with foil. Place the pinecones on it and put it in oven. Bake them at about 200 ° until the sap is melted and the pinecones are open. Test first with one pinecone to get the right temperature. As an added bonus, your house will smell wonderful!

Now, here is a little inspiration for you!


Now come's my favorite part! Let's learn a craft together! And I know just what we should make...


I love these cute little pine cones, and they really aren't that difficult to make.
Just sew some little yoyo's and stuff them with cotton or whatever you wish. Then secure them to your pine cone with a hot glue gun. To make them stand up you can either make a little ring around the bottom with a pine cleaner, or you can just just about anything that is ring shaped. You can also use these pretty pine cones to make a wreath or attach a ribbon for Christmas ornaments. 

I am so excited about Christmas, and if you're a crafter like me, now is the time to start making those handmade gifts you're famous for! Christmas will be upon us before you know it.


Have a stress free Friday :-)


Tuesday, November 2, 2010

Christmas Decorations- Part 2

Let's start off with some history..."The origin of the Christmas wreath dates back to the ancient cultures of the Persian Empire. During that time, wreaths were believed to be a symbol of importance as well as success. They were much smaller in size than the present ones and were known as 'diadems'. People used to wear the wreaths as headbands, sometimes along with jewels also. Somewhere around the 776 BC, Greeks started placing wreaths, made of laurel, on the head of the athletes who came first in the Olympic Games. 

Even in ancient Rome, the chief of leaders, like Julius Caesar, used to wear wreath on his head, just like the crown of a king. The transition of the wreaths from a headgear to a wall/door decoration is not known with much accuracy. However, it is believed that once an athlete decided to save the headgear as a souvenir of his/her victory. From then onwards, started the tradition of using wreaths as a Christmas door/wall decoration."

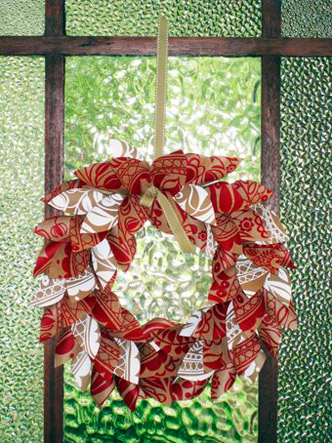
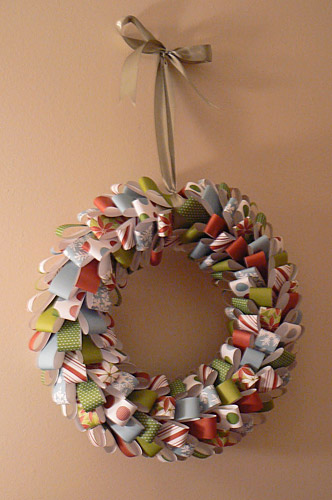
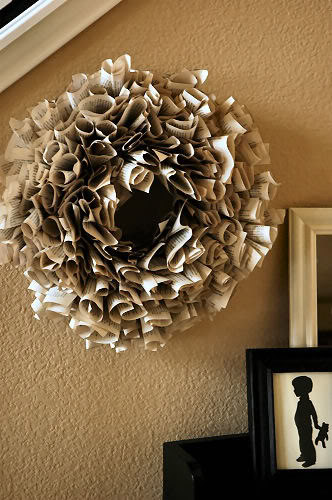
Check out these sweet paper wreaths; you can make one for every holiday if you have a little imagination. 


Let's learn how to make this one together shall we? Ok Great!

What you need...

• 1 to 2 sheets of wrapping paper - I used the same paper in 2 different colour ways. Think outside the square with your paper choice - you needn't use wrapping paper, it could be magazine pages, plain old white office paper, old comic books, anything! Patterned scrapbooking paper would also look fab. You needn't limit it to 2 patterns, if you kept to a consistent colour palette you could use any number of patterns or plain colurs.
• 1 large and one smaller plate, salad bowls or similar to trace around (unless you have a really big compass??)
• lightweight cardboard
I used ivory card, but it could just be the side of a box because it will be hidden. The size you'll need will depend on the size of your bowls.
• scissors
• stapler
• sticky tape
• ribbon - roughly 65cm

Start by finding your plates or bowls to trace around. The diameter of my large salad bowl is 34cm, and the smaller one is 21cm. If your circles are much larger or smaller you will have to adjust the size of your leaves accordingly. The diameter of my finished wreath is 42cm, which is the perfect size to hang on a door.
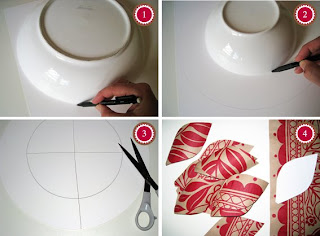

1. Place the large bowl upside down on the cardboard and trace around it.

2. Place the small bowl upside down in the centre of the circle you've just drawn and trace around it.

3. Cut around the outside of the largest circle. Then cut across your circle, through the centre until you reach the far edge of the small circle. Next cut across the line you just cut so you now have a + in the centre of your circle. This just makes it easier to cut the small circle out. Cut out the small circle so you end up with a donut shape. Join the open ends of the donut back together with sticky tape. (of course if you have a craft knife and cutting mat you could just cut around the two circles)

4. Draw a leaf shape about 12.5 cm long on a piece of paper, and cut it out to use as a template. I cut the point off one end of the leaf so I knew which end was the bottom. I used 64 leaves in total, of which 16 were white. The number of leaves you need may vary slightly depending on how much you overlap your leaves.


5. Roll the bottom edges of the leaf together so they overlap and the sides curl up.

6. Staple the rolled leaf to the bottom, just off centre, of the wreath base so the open end of the leaf is pointing out and down.

7 & 8. Continue rolling each leaf as you go, stapling them in position so they overlap the previous leaf. They need to overlap and be placed close to each other so the cardboard base and the staples aren't visible. The leaves should be positioned so that they follow the curve of the wreath base. The placing is fairly random, the leaves aren't in rows. If you are using an accent paper (like my white one) place one for every 4 -6 of the main colour leaves. Make the colour placement random too.


Looking at the back of the wreath you can see that the staples
attach the leaves to the centre of the cardboard ring,
and the leaves fan outwards.


9. & 10. Continue stapling the leaves in place. I found it useful to stop often and hold the wreath at arms length so I could see the overall shape that was being formed. Make sure the tips of your leaves follow the curve of the wreath base.

When you have reached half way stop and go back to your original starting point. Now start again from this point, facing your leaves the other way and going in the opposite direction around the wreath. Make sure that you overlap the leaves at the starting point, so there are no gaps. If this seems a bit too tricky you can always just continue on as you were all the way around the circle so all your leaves will be facing the same way. Complete the circle of leaves.

11. & 12. Tie a half bow in your ribbon so there is a small loop and one short and one long end. Thread the long end behind in the leaves in the top centre of the wreath. Staple the ribbon to the wreath.

The wreath is so light that it can easily be hung with Blu-Tac. I just put a blob each at the top and the bottom of the wreath and one on the top of the ribbon.

Thank you theredthread for this tutorial!

I hope you all have a lovely Tuesday! 


Monday, November 1, 2010

Christmas Decorations- Part 1

I know I'm starting early, but Christmas is my second favorite holiday (second to Easter). I'm just bursting with excitement and joy; my blog has to reflect that. 
So, let's start!

Today we'll look at the Christmas stocking. There are plenty of stories out there explaining the origin of the popular Christmas decoration. Here is just one of them. 


"The tradition of the Christmas stockings began by a story told since ancient time about a kind noble man who had three daughters. The wife of the nobleman expired and the daughters and their father were left in a state of sorrow. The daughters had to do all the work in the house. When the daughters became young and eligible for marriage, the poor father could not afford to give the huge dowries to their husbands.
One evening the daughters, after washing their stockings hung them near the fire place to be dried. Santa Claus being moved by the plight of the daughters came in and put in three bags of gold one in each of the stocking hanging by the chimney. The next morning the family noticed the gold bags and the nobleman had enough for his daughter’s marriage. The daughters got married and they lived happily ever after. Since then children have been hanging Christmas stockings."

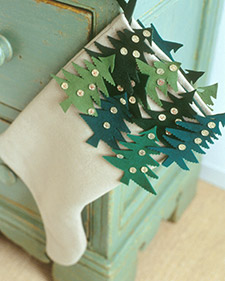
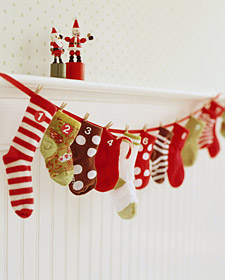
Check out these sweet Christmas stocking that you can make yourself. 


Each stocking should be unique and reflect the personality of the owner. It's fun to get everybody together ,before decking out the house with garland and lights, and make stockings together. I think that making crafts together can give families that valuable time back that sports, careers, and cell phones have taken away. It's great and all to be well rounded and be active in so many things, but never forget that your one on one relationships are what really matter. They are what count the most in the end. 


Wana make this cutey?
Great! Let's get started!
With a large crafts needle and contrasting color yarn, sew a running stitch to join the two mitten shapes together, leaving an opening at the wrist. For a decorative band, glue felt strips along the open edge. For a hanging loop, cut a felt strip; stitch to one edge of the opening.


Have a happy Monday and get creative with your holiday decorations!

Move over Halloween, it's time for Christmas!

Lady's and Gentlemen! Boys and Girls! It is officially November 1st. In other words....time to start thinking about Christmas!


I would like to search the internet and find some Christmas crafts. I'll be looking for everything from decorative stockings to handmade gifts and yummy holiday treats!

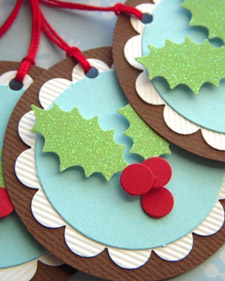
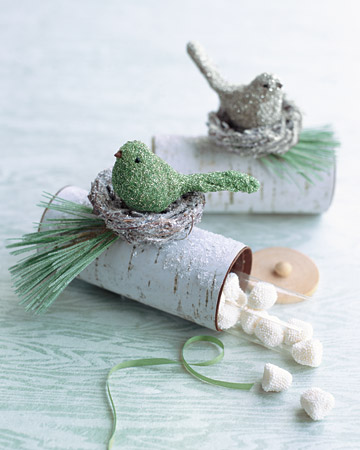
Here is just a weee little taste of some holiday crafts. Go ahead and click on the link to get the instruction.


Now I got all these from Martha Stewart (she's got some pretty cool stuff) but I'll be looking around every nook and cranny of the world wides web for some awesome goodies.